How to Fix “Could Not Load Dynamic Library ‘cudart64_110.dll’;dlerror: cudart64_110.dll not found” Error

Let’s break this down in a conversational and approachable way, covering what causes the error, how to fix it, and why it even happens in the first place.
What Is the CUDA Runtime Library?
First, let’s talk about what cudart64_110.dll actually is. The file is part of the CUDA runtime library, which allows software to communicate with NVIDIA GPUs (Graphic Processing Units). CUDA is essential when working with high-performance tasks like deep learning, gaming, or simulations. The “64” in the file name indicates it’s for 64-bit systems, and the “110” refers to CUDA version 11.0.
When your system or software throws the error “could not load dynamic library ‘cudart64_110.dll’; dlerror: cudart64_110.dll not found,” it means the system is trying to access the file, but it’s either missing or inaccessible for some reason.
Why Does This Error Happen?
There are a few reasons you might see this error. Here are the most common ones:
- CUDA is not installed or incorrectly installed: If you’ve just set up TensorFlow, PyTorch, or other GPU-dependent software but skipped installing CUDA, or if the installation didn’t go as planned, the cudart64_110.dll file may not be present on your system.
- Path Issues: Your system might not know where to find the cudart64_110.dll file. This usually happens if the CUDA installation isn’t properly configured in the environment variables, particularly the PATH variable. If the system can’t locate it, the error will be thrown.
- Version Mismatch: CUDA version compatibility issues often cause this problem. For example, your software might be expecting CUDA 11.0, but you have a newer or older version installed, which can lead to the system looking for cudart64_110.dll when it doesn’t exist in that particular version.
- Corrupted Files: Sometimes, the cudart64_110.dll file might be corrupted or missing from your system, even if you’ve installed CUDA.
How To Fix the Error
Let’s walk through some possible fixes, from the simplest to the more involved steps.
1. Check Your CUDA Installation
The first step is making sure CUDA is actually installed and that the correct version is on your system. You can download the correct version of CUDA from NVIDIA’s website. Be sure to install the CUDA version that matches the requirements of your software.
Pro Tip: Most deep learning libraries will specify the exact CUDA version you need. It’s crucial to match these versions to avoid errors like “could not load dynamic library ‘cudart64_110.dll’; dlerror: cudart64_110.dll not found.”
2. Add CUDA to the PATH Variable
Even if you have CUDA installed, your system might not know where to find it. You’ll need to make sure that the cudart64_110.dll file is in the PATH environment variable.
Here’s how you can check that:
- Windows:
- Open the Control Panel.
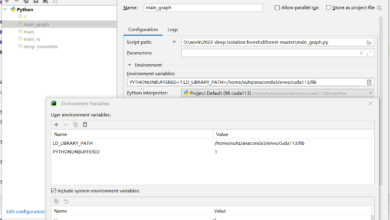
- Go to System > Advanced System Settings > Environment Variables.
- Under System Variables, find the PATH variable, and make sure the directory where CUDA is installed (for example, C:\Program Files\NVIDIA GPU Computing Toolkit\CUDA\v11.0\bin) is included.
- Linux:
- Open your terminal and add the CUDA path to your
.bashrcor.bash_profilefile. - For example, you can add:
export PATH=/usr/local/cuda-11.0/bin:$PATH - Then run
source ~/.bashrcto refresh your settings.
3. Verify CUDA Version Compatibility
Many users report that even if they have CUDA installed, the version might not match what their software is expecting. For example, TensorFlow might be expecting CUDA 11.0 but you have CUDA 11.1 installed, and that’s why the cudart64_110.dll file isn’t being found.
Check your software’s documentation to see which CUDA version it requires. You can install multiple versions of CUDA on the same machine if needed.
4. Reinstall or Repair CUDA
If your CUDA installation is corrupt, you might have to reinstall it. Uninstall CUDA from your system, then go through the installation process again, making sure to follow all the instructions.
Bonus Tip: A lot of people have found success using the conda package manager to install CUDA along with deep learning libraries like TensorFlow or PyTorch. Using conda makes sure that the correct CUDA version is installed automatically.
Final Thoughts
The “could not load dynamic library ‘cudart64_110.dll’; dlerror: cudart64_110.dll not found” error can be frustrating, especially if you’re excited to run GPU-accelerated tasks, but it’s usually not hard to resolve once you understand the underlying cause.
Make sure that CUDA is installed correctly, the path is set properly, and you’re using the right version for your software. If you follow these steps, you should be back on track quickly and ready to harness the power of your NVIDIA GPU!
Good luck, and feel free to reach out if you need more help on this!
